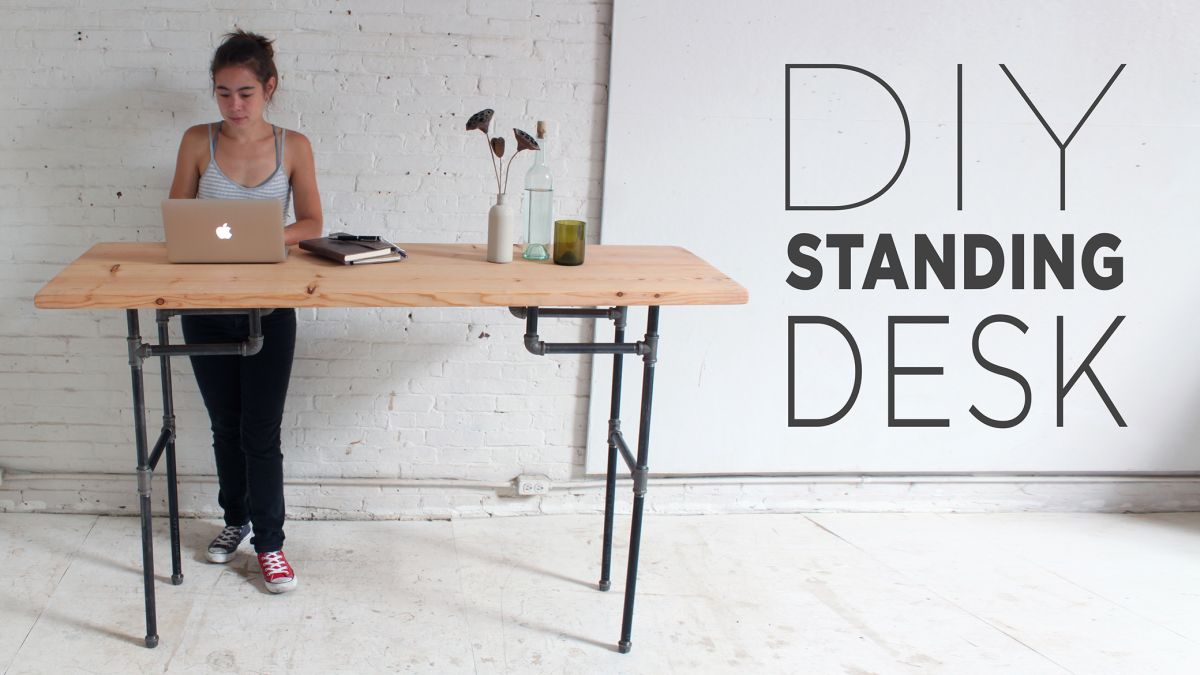
DIY Standing Desk From Galvanized Pipes
This Standing Desk is fabricated from 2x12s wood board and plumbers pipe. The pinnacle of the desk-bound can exist adapted by switching out dissimilar sections of pipage. All of the materials for this continuing desk tin can exist purchased at Home Depot.
 View in gallery
 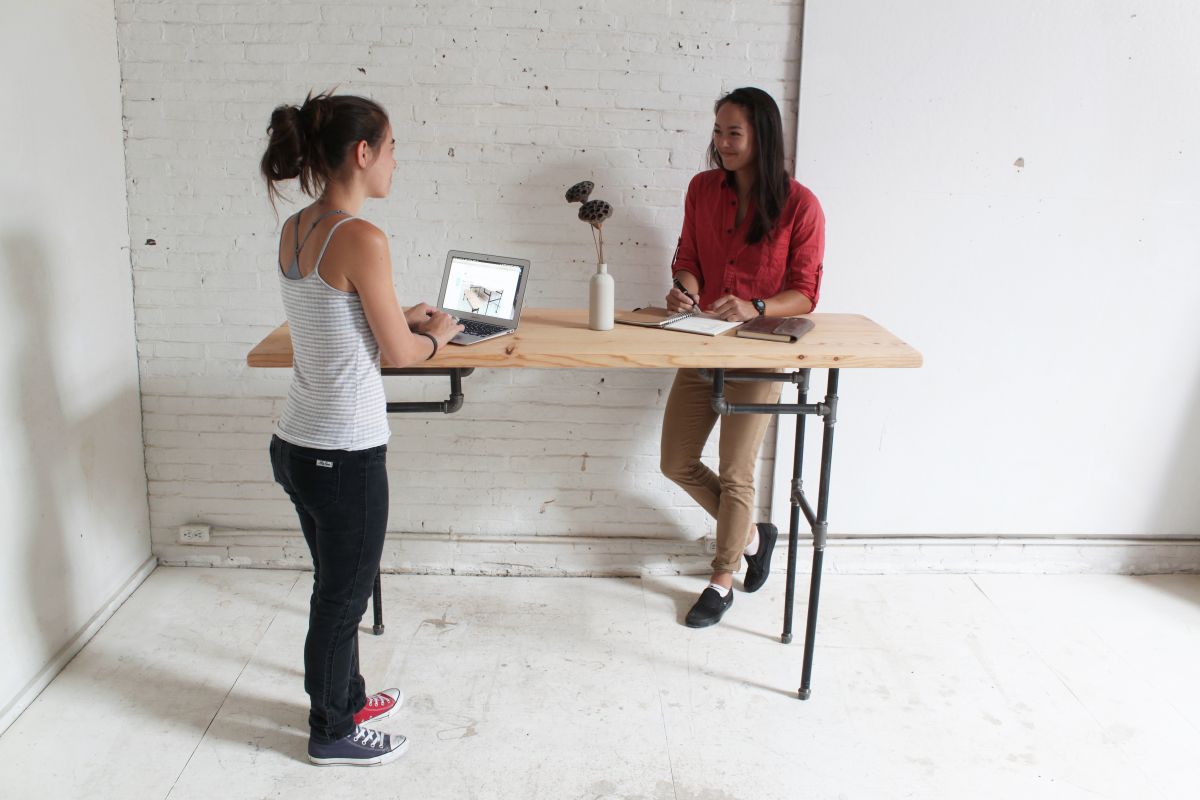 View in gallery
  View in gallery
 Supplies yous'll demand for standing desk:
- one – 2″x12″x12′ board
- half dozen – 10″ mending plates
- 3/4″ black atomic number 26 pipes
- 4 @ 18″
- six @ 12″
- iv @ 10″
- eight @ 4″
- **These measurements are for a 42″ high desk-bound**
- iii/4″ black fe couplings
- 8 – flanges
- eight – t's
- iv – 90°elbows
- 4 – end caps
- 1/4″ blackness drywall screws
- Danish oil (or stain/protective glaze of selection)
Tools you lot'll need for this project:
- circular saw
- orbital sander
- 18 Volt cordless drill
How to build a standing desk from pipes and wood: Pace by Step process
Pace 1: Measure out & Cut the Boards
Cut the boards to the finish length of 5'6″, using a speed square to make sure to get a perfect right angle cut.
 View in gallery
 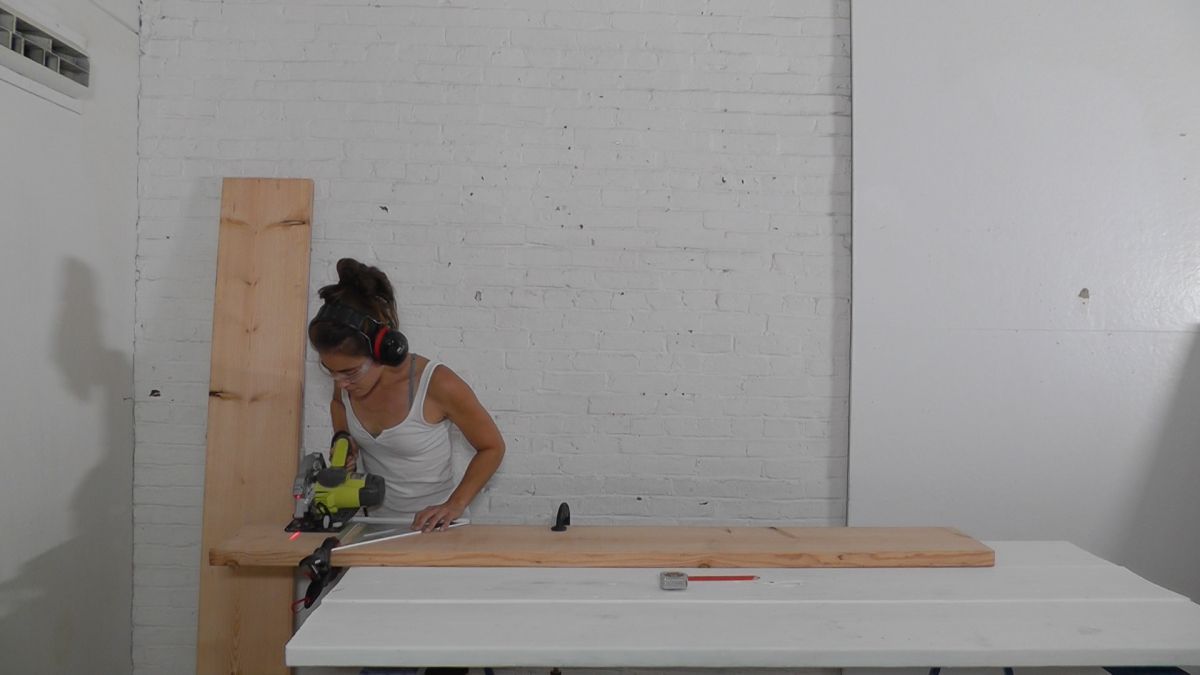 View in gallery
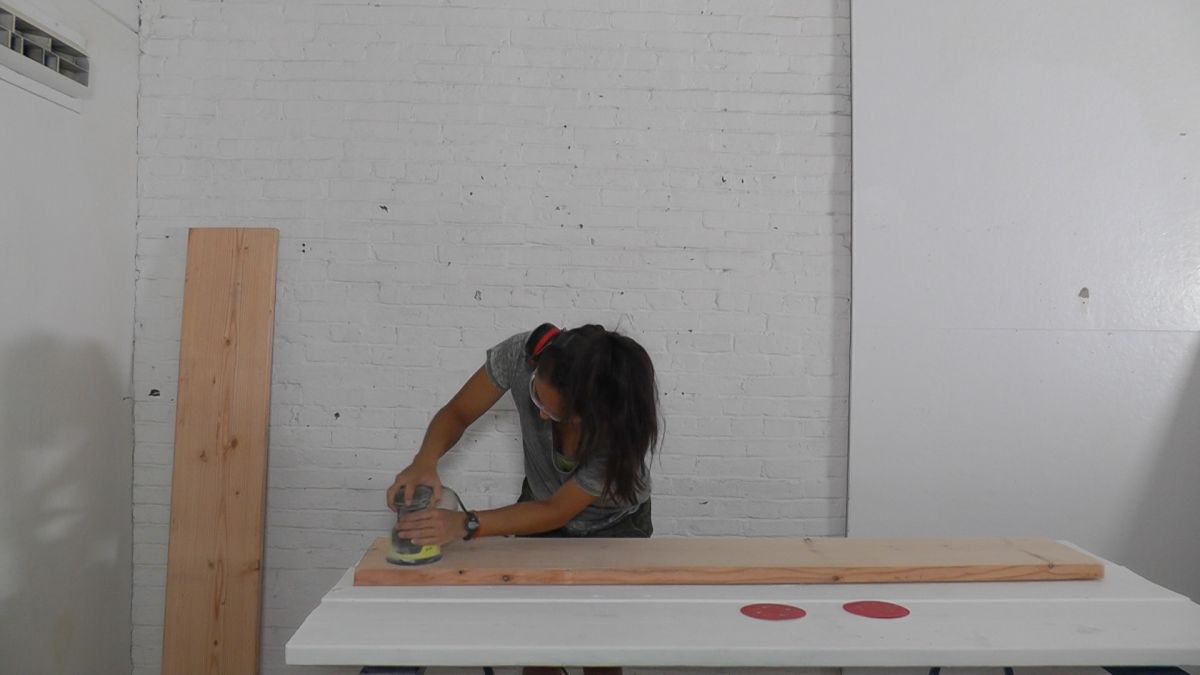
 Step 2: Sand the Boards
Sand the boards down, first using a coarser grit similar 100, so finishing at 22o using the orbital sander. We made sure to take special intendance to round all the edges and corners to get a smooth await.
Related: How To Build DIY Pipe Shelves For Your Dwelling From Scratch
 View in gallery
  View in gallery
 Stride 3: Wipe and Stain the Boards
Wipe all the grit from the boards earlier using a rag to apply a coat of natural Danish oil. The natural Danish oil gives a coat of protection for the boards while keeping the integrity and clarity of the natural woods color.
 View in gallery
  View in gallery
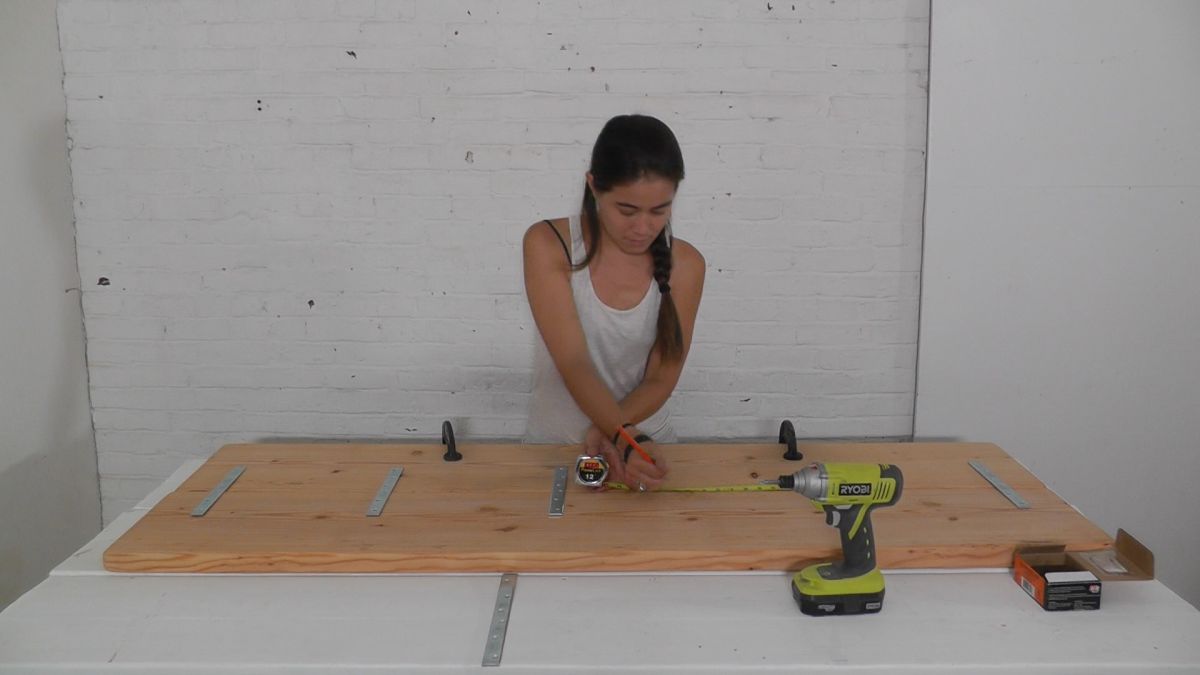
 Step 4: Attach the Boards Together
Using the 10″ mending plates, attach the 2 2″x12″ boards together. We centered the plates 4″ in from the ends of the boards, and so roughly 12″ apart leaving about 6″ of space between the centre ii. To ensure that the boards stay together, clamp i board to the worktable and inquire for assistance to pull the 2d board into the get-go equally you spiral in the plates.
Related: 20 DIY Desks That Actually Work For Your Home Office
 View in gallery
  View in gallery
 Step 5: Get together the Legs
Get together the legs using all the pipes and connectors. Putting them together is piece of cake and fun, but brand sure that the end outcome is directly and screwed together tightly.
 View in gallery
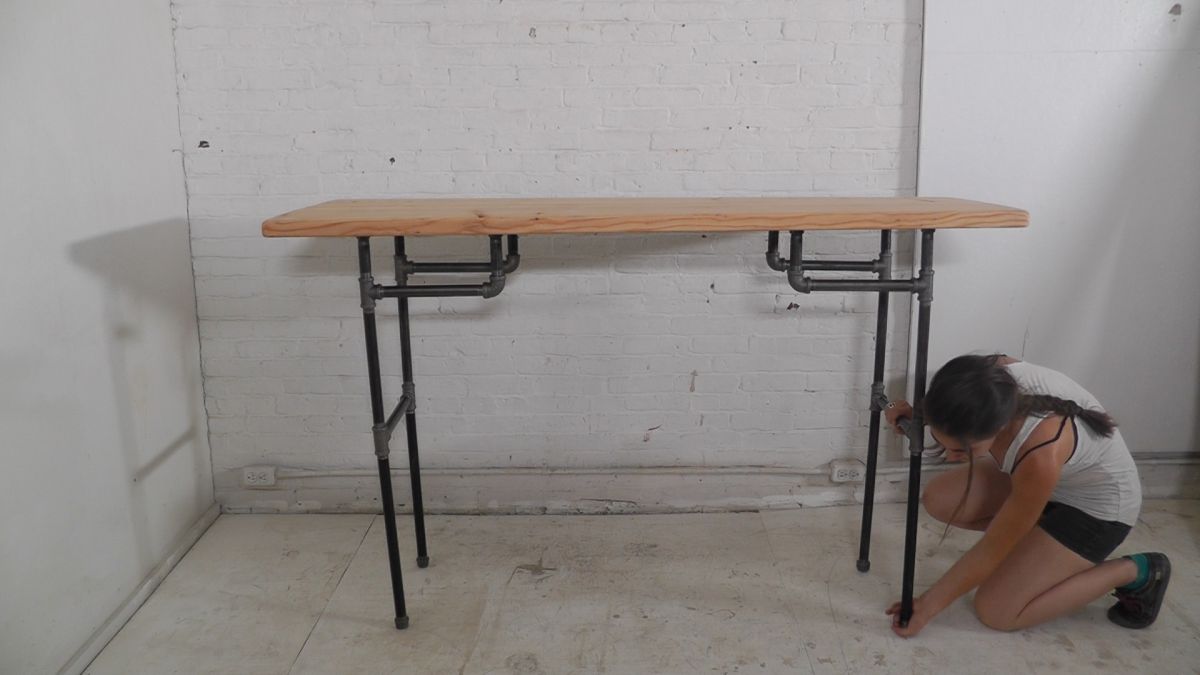
 Step 6: Attach Legs to Boards
Identify the legs on the inside of the outermost plate, or about vi″ in from the ends and 3″ in from the sides. It can be a fleck difficult to maneuver the drill while it's so close to the pipes, just be sure to drill the screws straight into the wood.
 View in gallery
 Step 7: Adjust Legs as Needed
If the floor of your infinite is uneven, y'all can accommodate the cease caps to level the tables.
 View in gallery
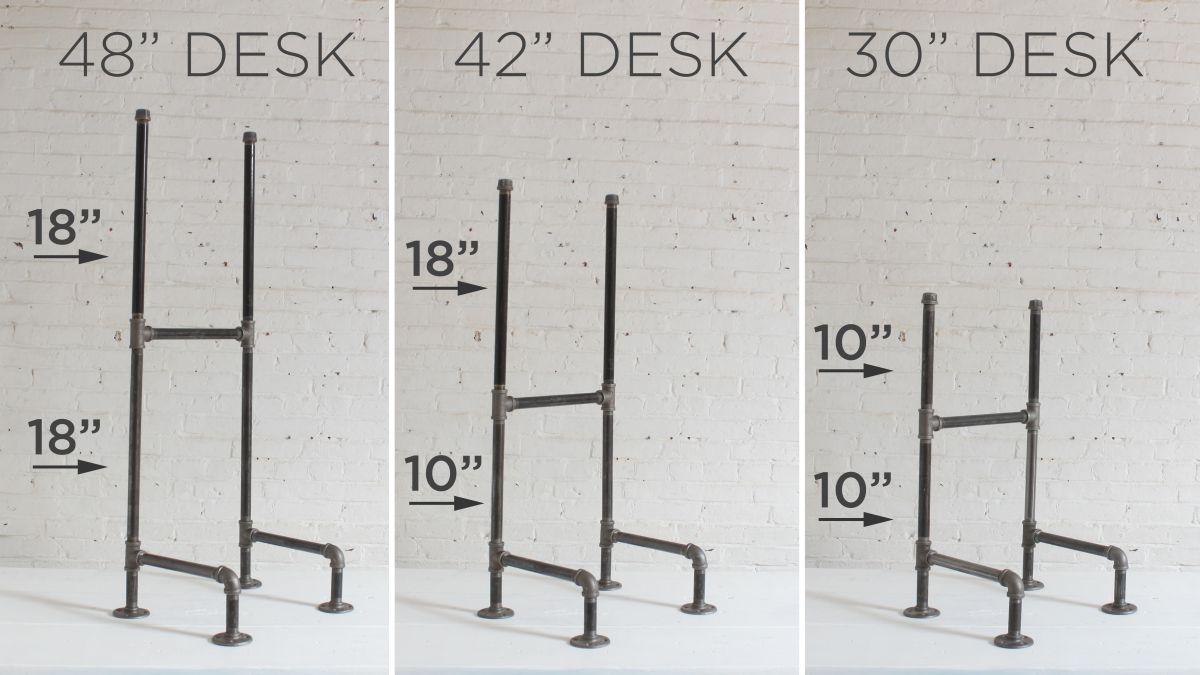
 There are many different options for the acme of your desk. We listed the three that we found well-nigh useful for our needs. The exact height of the desk volition fluctuate depending on how tightly you're able to screw the pipes to the couplings, every bit well as the thickness of the boards if yous choose a unlike type of tabular array top.
 View in gallery
  View in gallery
 Proficient luck making your own Standing Desk!
mcreynoldsbrich1991.blogspot.com
Source: https://www.homedit.com/diy-industrial-standing-desk/
0 Response to "DIY Standing Desk From Galvanized Pipes"
Enregistrer un commentaire