Does Reloading a Scene Cause Void Start to Run Again

Loading a new Scene in Unity tin can be very straightforward, requiring only a unmarried line of lawmaking.
However,
Despite being elementary to do, the best technique for loading new Levels will vary depending on how y'all want to practise information technology.
For instance, y'all may want to display a loading screen, a progress bar, or show tips or other information while the actor waits for a Level to load.
Too, how you structure your game may touch how yous load and move between Scenes.
If your game is minor, you might simply need a few different Scenes.
However, if you're making a larger game, you might need to split your game, and even each level, into many dissimilar Scenes.
In that location is no ane size fits all, but agreement the different options that are available to you, and seeing examples of how to actually use them, can make information technology much easier to pick the right method of moving betwixt Scenes for your game.
Which is exactly what you'll learn in this article.
What you'll find on this page:
- How to load a new Scene in Unity
- Load the adjacent Scene in guild
- Load Scene vs Load Scene Async
- How to make a Loading Screen in Unity
- How to make a Loading Progress Bar
- How to fade the Loading Screen
- Example 1: The Prefab Method
- Example 2: The Persistent Method (using Don't destroy on load)
- Example 3: The Loading Scene Method
- How to pass data between Scenes in Unity
First, let'southward get-go with the basic method of loading a new Scene in Unity
How to load a new Scene in Unity
To load any Scene from a script in Unity, showtime, yous'll demand to make certain that the Scene y'all desire to load is included in the build.
Otherwise, if the Scene hasn't been added to the Build Settings, or the Asset Packet hasn't been loaded, none of this will work and the Scene won't load.
To check, select File > Build Settings and, if you lot can't see the Scene listed, simply drag it to the list of Scenes from the Project View.
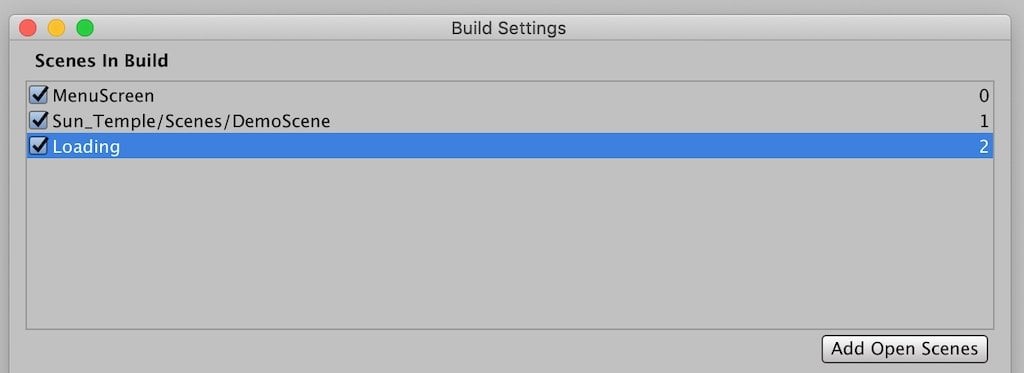
Recall to add the Scene you want to load to the build, otherwise, none of this will piece of work.
Next, you'll need to add the Scene Management namespace to whatever script that you want to load Scenes from.
Simply add "using UnityEngine.SceneManagement;" with the other using directives.
Like this:
using System.Collections; using System.Collections.Generic; using UnityEngine; <strong>using UnityEngine.SceneManagement;</potent> This will allow you to utilise functions from the SceneManager form.
Finally, to load a new Scene, call the Load Scene office, passing in the name of the Scene yous'd like to load.
Like this:
SceneManager.LoadScene("DemoScene"); Alternatively, you can use the Scene's index instead.
Like this:
SceneManager.LoadScene(i); If yous don't know the index of the Scene you lot want to load, you lot tin can await it upwards by opening the Build Settings. You can besides reorder Scenes to change their index number.
Loading past a Scene's alphabetize tin can exist especially useful if you desire to load Scenes in order; For example, if you want the thespian to proceed to the next Scene in the listing at the end of each level.
If it suits the construction of your game, loading the adjacent Scene instead of a specific Scene can be easier to manage, every bit you won't need to explicitly name the Scene to be loaded.
And then how do you load the side by side Scene on the list?
How to load the next Scene in Unity
To load Scenes in order, i.e. load whatever Scene is next on the listing after the current Scene, all y'all need to exercise is become the electric current Scene index and add 1.
Simple, right?
Here's what it looks like in scripting:
using System.Collections; using System.Collections.Generic; using UnityEngine; using UnityEngine.SceneManagement; public grade LoadScene: MonoBehaviour { public void LoadNextScene() { SceneManager.LoadScene(SceneManager.GetActiveScene().buildIndex + i); } } All this does is go the alphabetize of the active Scene and increase it by ane, which is ideal for advancing to the next Scene at the terminate of every level.
Proceed in listen, nonetheless, that this just really works when your game structure allows for it (i.e. players are meant to experience every Level in gild) and only when each Scene is in the correct order in the build list.
Because of this, yous'll need to exist careful to avert accidentally reordering Scenes in the Build Settings.
Even so…
This can also be a benefit.
While yous volition need to be careful to go along the Scenes in the order you lot want them, it also means you can move Scenes to a different position very easily.
When using this method, irresolute the lodge of Scenes in your game is as easy as reordering the build list.
Load Scene vs Load Scene Async
There are two different methods bachelor for Loading a scene.
Load Scene and Load Scene Async.
So what's the divergence?
Load Scene, as used in the earlier example, loads the Scene directly with loading taking place during the next frame:
SceneManager.LoadScene(sceneToLoad); While the Scene loads, the game will freeze.
Music and sound will continue to play but the game will be unresponsive until the load has finished.
Depending on the corporeality of fourth dimension that's required to load the adjacent Scene, this pause can give the impression that the game has crashed, unless you hide the pause with a Loading Screen (more on that later).
However, it's also possible to load the next Scene in the background, asynchronously, while withal allowing the game to run, using Load Scene Async.
Load Scene Async works in a similar way to Load Scene, except the loading takes place every bit a background functioning and is spread over multiple frames:
SceneManager.LoadSceneAsync(sceneToLoad); There are a few reasons that you might want to do this.
For example, you might want to keep the electric current Scene running until the new Scene is gear up.
Or, if your loading screen includes animated elements, such equally tooltips or a loading icon, these can just work when loading the Scene in the background.
As well, equally an Asynchronous Performance, you accept the option to check when the loading has finished using AsyncOperation.isDone. You tin even get the current progress of the load, which is useful when making a loading progress bar.
How to get the Load Scene Async progress
To access the progress of the load, cache a reference to the Asynchronous Functioning when you call it.
Like this:
AsynchronousOperation loadingOperation = SceneManager.LoadSceneAsync(sceneToLoad); Yous tin then access the functioning's backdrop.
For example the progress:
float loadProgress = loadingOperation.progress; Which returns the progress of the load as a float value between 0 and 1.
Or to bank check if loading is finished.
Like this:
if(loadingOperation.isDone) { // Loading is finished ! } These additional backdrop are only bachelor when using Load Scene Async.
Why does Unity notwithstanding freeze and stutter when using Load Scene Async?
Load Scene Async, while described as a background functioning, is nevertheless a heavy task to perform.
Yous may find that it volition even so cause the game to stutter or fifty-fifty freeze while loading takes place.
Even so…
If this is happening in your projection, you lot might not actually take an issue.
Loading a new Scene in the editor will bring well-nigh Scenes, even very basic ones, to a complete halt.
Nevertheless, if y'all build the project first you'll notice that the loading process, and speed, is significantly better than when previewing information technology in the editor.
So, if you're having issues with how smoothly your Scenes load, and you haven't tried building your projection all the same, try running a finished build first.
This will assistance you to get an idea of what the loading process is actually similar in your game.
How to make a Loading Screen in Unity
Regardless of which loading method you use, it's often a good idea to apply a Loading Screen to disguise the loading procedure.
And while you may adopt to avoid Loading Screens altogether, every game needs to load something at some signal and using one can make the feel of transitioning between menus and levels much smoother.
And then what should yous add to your Loading Screen?
In its well-nigh basic form, you'll need something to comprehend the screen with that can besides be used as a background for a loading message or other data.
For example, a UI image, set to black and stretched to fill the screen, works well for this:
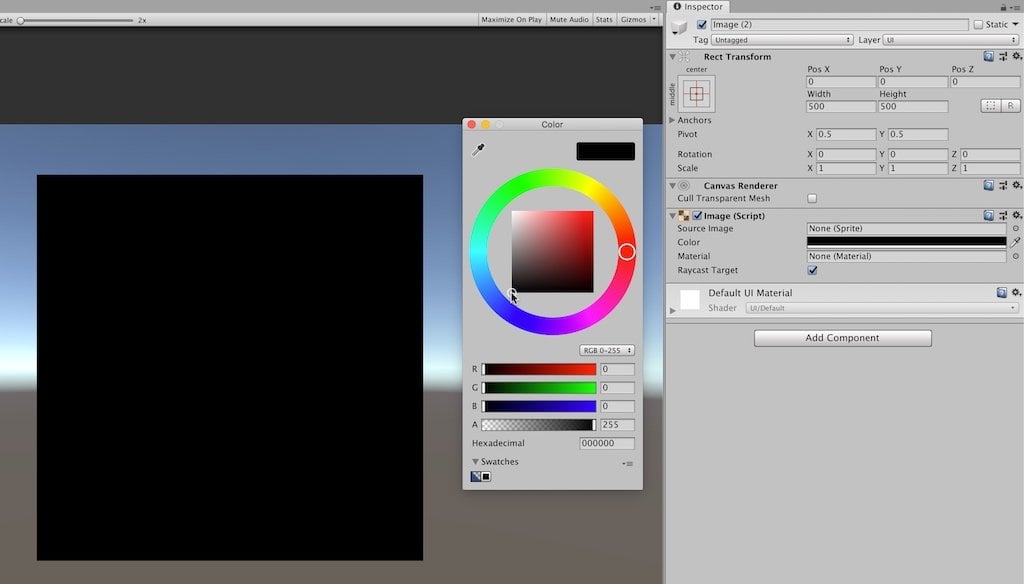
Add a UI Image to human action as a background for your Loading Screen.
Better yet, why not add a custom image that sets upwardly the Level that's beingness loaded.
Here I've used an in-game image of the Sun Temple asset that I've been using to test with, with a faded area at the bottom to go out some infinite for messages.

Using a custom background image can help gear up the scene for the Level that's being loaded.
Speaking of messages, there should be something to point that loading is taking identify.
Why?
The point of using a Loading Screen at all is to communicate that the game has non, in fact, crashed. And then it's a good idea to include some sort of indicator that in that location is something going on behind the scenes.
This could exist a simple "Loading" message or some kind of animated icon.

I added a Text object and a rotating Paradigm to brand this loading message.
While an blithe icon tells you that the game is loading, a progress bar or a percentage brandish is a great way to show how much of the Level is loaded.
So how exercise you practice that?
How to make a loading Progress Bar in Unity

Here's how to brand a loading Progress Bar in Unity.
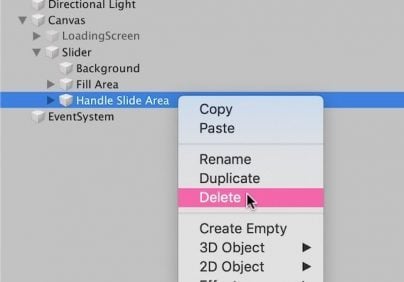
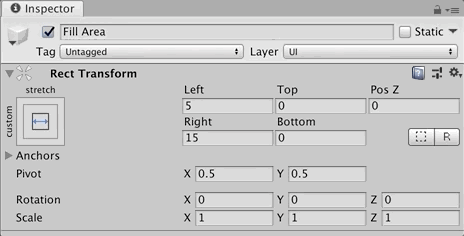
1. Fix upwards a Slider to deed as a Progress Bar:
- Create a UI Slider

- Remove the handle
- Set the left and right values in the Rect transform to cypher on both the Fill Area object and the Fill up object
2. Load the Scene Asynchronously
- When loading the Scene apply Load Scene Async, otherwise this won't work
- Cache a reference to the Asynchronous Functioning when you call it, like this:
public string sceneToLoad; AsyncOperation loadingOperation; void Commencement() { loadingOperation = SceneManager.LoadSceneAsync(sceneToLoad); } iii. Update the Slider during the load
- Get a reference to the Slider (recollect to add using UnityEngine.UI; to the script)
- Get the loading progress, which is a float value betwixt 0 and 1 (using AsyncOperation.progress)
- Using Mathf.Clamp01, convert the progress to a value between 0 and 0.9, like this:
public string sceneToLoad; AsyncOperation loadingOperation; Slider progressBar; void Start() { loadingOperation = SceneManager.LoadSceneAsync(sceneToLoad); } void Update() { progressBar.value = Mathf.Clamp01(loadingOperation.progress / 0.9f); } Why do y'all need to catechumen the progress to value betwixt 0 and 0.9f?
This is because the loading operation's progress is just measured upwards to 0.9, with the last 0.1 being used for activation (which won't exist visible on the Slider).
Doing it this manner means the bar will fill up completely.
For a really expert explanation on how this works, endeavour Brackeys' video (Youtube).
Keeping the last value between 0 and 1 makes it a little easier to also convert the loading progress to a percentage, which is useful if you'd like to display a percentage value besides.
Brandish the load progress as a pct
To brandish the load progress as a percentage, just like before, when creating the Progress Bar, take the Async Functioning Progress value and convert the value to a float between 0 and 0.9:
float progressValue = Mathf.Clamp01(loadingOperation.progress / 0.9f); So, to display it as a pct, simply round the value, multiplied by 100, to the nearest integer.
Like this:
public String sceneToLoad; AsyncOperation loadingOperation; public Text percentLoaded; void Start() { loadingOperation = SceneManager.LoadSceneAsync(sceneToLoad); } void Update() { bladder progressValue = Mathf.Clamp01(loadingOperation.progress / 0.9f); percentLoaded.text = Mathf.Round(progressValue * 100) + "%"; } How to fade the Loading Screen
Fading in the Loading Screen is a peachy manner to smooth out the transitions between screens.
But, while single UI elements tin can be faded by setting the Blastoff of their Canvas Renderer, chances are your Loading Screen is fabricated up of multiple elements.
Luckily, there's a elementary solution.
A Canvas Grouping component makes information technology easy to employ settings to a number of UI elements all at one time.
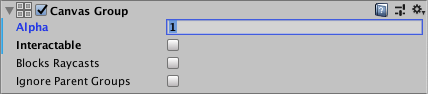
Control multiple UI elements with a Sail Grouping
For example, to create a Loading Screen y'all might use multiple UI objects, such as a background prototype, some text and a slider.
Using a Canvas Group makes it like shooting fish in a barrel to utilize the aforementioned settings to all of those objects, so long as they're Child objects of the Parent Loading Screen.
To fade the screen, Lerp the Sheet Group Blastoff value between 0 and 1 in a Coroutine.
- The right way to Lerp in Unity (with Examples)
- Coroutines in Unity (how and when to utilise them)
Like this:
public CanvasGroup canvasGroup; void Get-go() { StartCoroutine(FadeLoadingScreen(2)); } IEnumerator FadeLoadingScreen(float duration) { bladder startValue = canvasGroup.blastoff; bladder time = 0; while (time < duration) { canvasGroup.alpha = Mathf.Lerp(startValue, i, fourth dimension / elapsing); time += Time.deltaTime; yield return null; } canvasGroup.blastoff = i; } When fading during loading, just as with other blitheness, yous'll need to utilise Load Scene Async.
That is, if you want loading to start at the same time as the fade.
However, if you're using the basic Load Scene method, and you still want to fade the screen, you tin can.
Just brand sure to perform the fade before starting the load.
Brand it interesting
Once y'all know how to build the different elements, it becomes easier to create a Loading Screen that'south unique to your game.
And, personally, I think that it's worth taking extra time and attempt to create a Loading Screen that is engaging, overnice to look at or that smoothes out the transitions between menus and levels in your game.
Why?
Because loading is waiting and waiting, even in small bursts, is rarely fun.
And, while it's inevitable, in many cases at least, to have to wait for some function of your game to load, that doesn't mean it tin't be a pleasant experience, or informative or, especially in tricky games, a run a risk to familiarise the player with some of the controls or concepts of the game.
So why not make the most of information technology.
Adding the Loading Screen to your game (3 examples)
One time you've designed a Loading Screen, information technology's fourth dimension to implement it.
And while in that location'due south no one way to do this, at that place are a few options that may be more or less suitable, depending on the how you organise your game'southward structure.
Beneath are three dissimilar options for calculation the Loading Screen to your Unity project.
Case i: The Game Object method (using a Loading Screen Prefab)
This is, potentially, the simplest of the three methods in that it requires very fiddling set upwardly.
Y'all merely create your Loading Screen as you want it, store information technology as a Prefab, and and so add to any Scene that requires a Loading Screen.
Similar this:
Using a Loading Screen Prefab makes it easier to manage the object from one place.
using Organization.Collections; using System.Collections.Generic; using UnityEngine; using UnityEngine.SceneManagement; public class LoadScene : MonoBehaviour { public GameObject loadingScreen; public string sceneToLoad; public void StartGame() { loadingScreen.SetActive(true); SceneManager.LoadScene(sceneToLoad); } } The do good of this method is that it's very simple and like shooting fish in a barrel to manage, and any changes to the Loading Screen tin be made to the Prefab object.
All the same, you'll still need to add the Loading Screen object, and get a reference to it, in every Scene that uses information technology, which could get difficult to manage.
And while this isn't necessarily an sectional trouble (after all there will be other objects that are common to every Scene likewise, such as the player) y'all may observe it easier to manage only a single Loading Scene object in one location.
Such as in the Persistent Method.
Example ii: The Persistent Method (using Don't Destroy on Load)
This method works in nearly the aforementioned way equally the Game Object method, with one divergence.
Instead of using multiple Loading Screen objects (one for each Scene) that all derive from a Prefab, this method uses a single object that is reused for every Scene.
This is made possible by using Don't Destroy on Load, a office in Unity that prevents an object from being Destroyed when a new Scene is loaded, as is the default.
To utilize it, call the Don't Destroy on Load function, passing in the Game Object you want to comport over to the next Scene.
In this example, pass in the Loading Screen Object
Like this:
public void Awake() { DontDestroyOnLoad(gameObject); } This is useful for creating more complex Loading Scene transitions that proceed until afterward a Scene is loaded.
For example, this jigsaw loading transition from Banjo Kazooie: Nuts and Bolts overlaps both Scenes, starting earlier and ending later the switch. In Unity, using Don't Destroy on Load allows y'all to create similar animations across two Scenes with just 1 Loading Screen object.
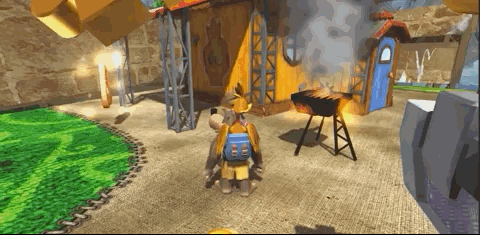
This loading sequence from Banjo Kazooie: Nuts and Bolts overlaps 2 Scenes. (Source)
In the example below I use the Persistent method to fade in a Loading Screen, earlier fading the same Loading Screen out once more once the new Scene is loaded.
using System.Collections; using Arrangement.Collections.Generic; using UnityEngine; using UnityEngine.SceneManagement; public class SceneLoader : MonoBehaviour { public GameObject loadingScreen; public string sceneToLoad; public CanvasGroup canvasGroup; public void Showtime() { DontDestroyOnLoad(gameObject); } public void StartGame() { StartCoroutine(StartLoad()); } IEnumerator StartLoad() { loadingScreen.SetActive(true); yield return StartCoroutine(FadeLoadingScreen(i, 1)); AsyncOperation operation = SceneManager.LoadSceneAsync(sceneToLoad); while (!performance.isDone) { yield render zero; } yield return StartCoroutine(FadeLoadingScreen(0, ane)); loadingScreen.SetActive(imitation); } IEnumerator FadeLoadingScreen(float targetValue, float duration) { float startValue = canvasGroup.alpha; float time = 0; while (time < duration) { canvasGroup.alpha = Mathf.Lerp(startValue, targetValue, fourth dimension / elapsing); fourth dimension += Time.deltaTime; yield return cypher; } canvasGroup.blastoff = targetValue; } } Create a split Sail just for your Loading Screen
When using the Persistent method, you may wish to create your Loading Screen on its own Canvas.
The Canvas object stores and displays UI elements for your game. Information technology's automatically created when y'all add a UI element and is the parent object for everything that you add to your carte du jour, hud and, in this case, Loading Screen.
However, it's also possible to create Canvasses manually, that are separate from others in the Scene.
And while creating your Loading Screen on its own Sheet isn't required for this method, it tin brand managing it easier.
This is because Don't Destroy on Load only works at the root level of an object, and then it makes sense to split up the Loading Screen Sheet from other UI elements that yous don't want to take through to other Scenes.
Separating the Loading Screen Canvass in this way means yous may end upward using multiple Canvas objects in your Scene.
To brand sure that your Loading Screen Canvas renders above other UI elements, set its Sort Guild higher than other Canvas objects.
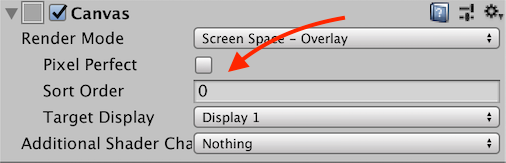
When using multiple canvases in Unity, the Canvas sort order decides which volition exist displayed on tiptop.
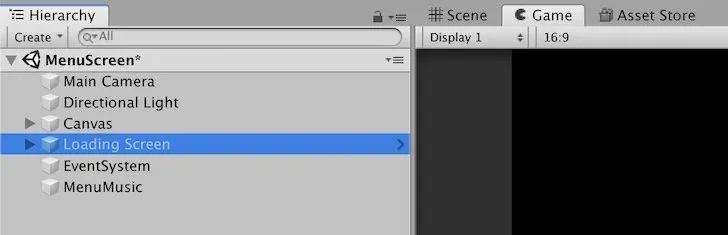
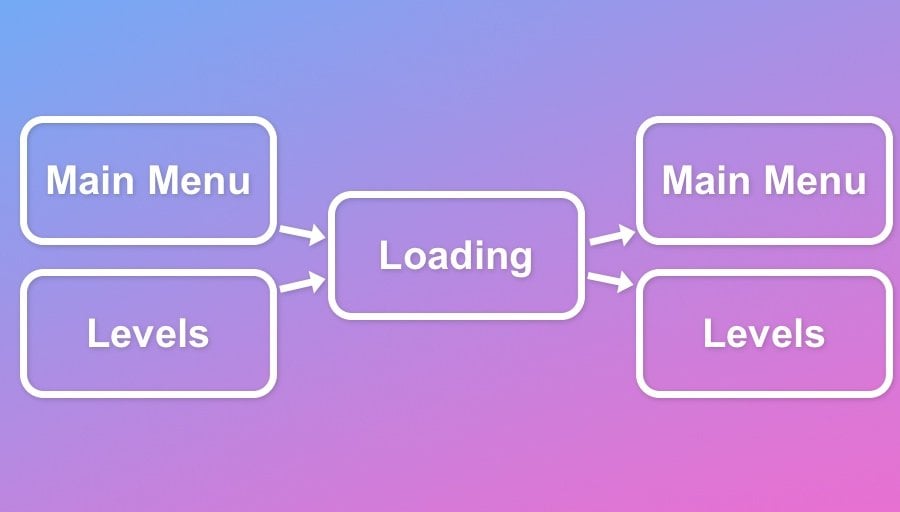
Example three: The Loading Scene method (using static data)
The Loading Scene Method involves using a dedicated Scene to display the Loading Screen instead of an in-game object.
This method is cracking for building really complex Loading Screens, with game tips, rotating 3D models, animated visuals etc.
And while yous can do all of that with an in-game object, it's much neater and easier to manage in a separate Scene.
And so how does it work?
- Create a Scene, chosen "Loading" or something similar, and build it just like you would using whatever other method.
- And then, when yous want to load a new Scene, instead of directly Loading the target Scene, transition to the dedicated Loading Scene.
- Inside the Loading Scene, add together a script to load the adjacent level of the game as presently every bit the Loading Scene starts.
Creating 1 special Loading Scene tin can be an easy way to manage Loading Screen objects in Unity.
Simple, right?
Except, there'south a problem.
Bold that your game is made up of many different Levels, how will the Loading Scene script know which Scene to load adjacent?
Luckily there's a uncomplicated method for passing data to a new Scene when you load it.
How to pass data and variables betwixt Scenes in Unity
There are several options for saving data that can be reused at a later fourth dimension. For example, Player Prefs or past saving information to a file.
Even so, for the purpose of transferring data from ane active Scene to the next, a Static Grade, that's created solely for passing information when loading, is one of the more appropriate options available.
This involves creating a public static class with public static variables that can be used to store the data that you want to transfer between Scenes.
In this case a static string variable tin exist used to store the name of the Scene that needs to be loaded next.
Then, when the loading script in the Loading Scene launches, it tin read the aforementioned value and load the required Scene.
This is helpful because the loading trigger doesn't need to get a reference to a Loading Screen object or the Loading Information class.
Because information technology's a publicly accessible static grade, all y'all need to do is type the form name. Any object can gear up the value directly for the Loading Screen script to read.
Here's how to do it:
- Create a new C Sharp script within your Projection View (remember there will not exist an instance of this script in any Scene). Call information technology LoadingData or something like
- Remove the Commencement and Update functions, as you won't demand them
- Remove ": Monobehaviour"as static classes can't derive from Monobehaviour
- You tin can too remove the "using" directives from the top of the script, as you won't need them
- Add the "static" keyword between public and grade
- Finally, add a public static string variable called sceneToLoad or similar
Your script should now look something like this:
public static class LoadingData { public static cord sceneToLoad; } In the Loading Screen Scene, create a script on a Game Object to read the Loading Information and load the target Scene.
Like this:
using UnityEngine; using UnityEngine.SceneManagement; public class LoadScene : MonoBehaviour { void Start() { SceneManager.LoadSceneAsync(LoadingData.sceneToLoad); } } Finally, when you want to trigger a Scene load from the game or from a menu, add the post-obit script, setting the string value to the name of the new Scene yous want to load.
Similar this:
using UnityEngine; using UnityEngine.SceneManagement; public class SceneLoadTrigger : MonoBehaviour { public cord targetScene; public void LoadScene() { LoadingData.sceneToLoad = targetScene; SceneManager.LoadScene("Loading"); } } This sets the scene name in the static Loading Data form and then immediately loads the Loading Scene which, in turn, reads the scene name and loads the final target Scene.
Like this:

Using a Static Class makes it easy to pass data from ane Scene to some other, such as the proper noun of the next Scene.
What's more, this method can be used to display additional information about the loading Scene.
For example, y'all could configure the Loading Screen to display a custom prototype or message based on which Scene was existence loaded.
At present it's your turn
How are y'all loading Scenes in your game?
Exercise you take many Scenes to bargain with, or only a few? And how are you managing them?
Or mayhap you've got a dandy tip for loading Scenes in Unity that other people would dear to know.
Any information technology is, let me know by leaving a comment below.

My favourite time-saving Unity avails
Rewired (the all-time input management system)
Rewired is an input management asset that extends Unity's default input system, the Input Managing director, adding much needed improvements and support for modern devices. Put just, it'south much more than avant-garde than the default Input Manager and more reliable than Unity'southward new Input System. When I tested both systems, I constitute Rewired to be surprisingly piece of cake to use and fully featured, then I can empathize why everyone loves it.
DOTween Pro (should be congenital into Unity)
An nugget so useful, it should already be built into Unity. Except it'south not. DOTween Pro is an blitheness and timing tool that allows you to breathing anything in Unity. You tin can motility, fade, scale, rotate without writing Coroutines or Lerp functions.
Easy Save (in that location'south no reason non to apply information technology)
Easy Save makes managing game saves and file serialization extremely piece of cake in Unity. So much so that, for the time it would accept to build a salve system, vs the price of ownership Easy Save, I don't recommend making your own salve system since Easy Relieve already exists.
mcreynoldsbrich1991.blogspot.com
Source: https://gamedevbeginner.com/how-to-load-a-new-scene-in-unity-with-a-loading-screen/
0 Response to "Does Reloading a Scene Cause Void Start to Run Again"
Enregistrer un commentaire